Thank you for choosing GSD IDEA as you IDEA StatiCa partner. This roadmap will guide you through 4 steps required to successfully implement IDEA StatiCa into your structural workflow. This can take 15 minutes.
شكرًا لاختياركم GSD IDEA كشريك لكم في IDEA StatiCa. سيرشدكم هذا المسار عبر 4 خطوات مطلوبة لتنفيذ البرنامج بنجاح في سير عملكم الإنشائي. قد يستغرق هذا 15 دقيقة.
your path to masteryالتأهيل المنظم
Four steps to initiate your IDEA StatiCa journey
مساركم نحو الإتقان
1. COMMUNITYالشبكة
You now have access to the IDEA StatiCa GCC LinkedIn community for regional insights and discussions.
يمكنكم الآن الوصول إلى مجتمع IDEA StatiCa GCC على LinkedIn للحصول على رؤى ومناقشات إقليمية.
2. LICENCEبيئة العمل
Get access to your organization’s license pool and ensure the software is ready for use.
احصل على حق الوصول إلى مجموعة تراخيص مؤسستك وتأكد من أن البرنامج جاهز للاستخدام.
3. PRE-ONBOARDINGالتنفيذ
Complete the technical readiness checklist before your onboarding session.
أكمل قائمة التحقق من الجاهزية الفنية قبل جلسة الإعداد الخاصة بك.
4. ONBOARDING SESSIONالمراجعة النهائية
Book the next available onboarding session and obtain your completion certificate.
احجز جلسة الإعداد التالية المتاحة واحصل على شهادة الإتمام الخاصة بك.
How leaders describe the value
كيف يصف القادة الهندسيون القيمة
“
We had to design each individual node due to the specific shape of the structure, with around 18 pipe members connecting at a single node joint in multiple directions. Meeting the 1-month deadline would not have been possible without IDEA StatiCa.
اضطررنا إلى تصميم كل عقدة على حدة بسبب الشكل الخاص للهيكل، مع توصيل حوالي 18 أنبوبًا في وصلة عقدة واحدة في اتجاهات متعددة. لم يكن الوفاء بالموعد النهائي البالغ شهرًا واحدًا ممكنًا بدون IDEA StatiCa.
“
At one critical joint, 13 members converged into a single node, many with different angles. Each truss had different loads and requirements. Using IDEA StatiCa we were able to design it in a matter of hours.
في إحدى الوصلات الحرجة، التقى 13 عنصرًا في عقدة واحدة، والعديد منها بزوايا مختلفة. كان لكل دعامة أحمال ومتطلبات مختلفة. باستخدام IDEA StatiCa، تمكنا من تصميمها في غضون ساعات.
Join Our Community
انضم إلى مجتمعنا
You now have access to the IDEA StatiCa Gulf User Group, a regional Community of structural engineers using IDEA StatiCa across the Middle East.
أصبح لديكم الآن إمكانية الوصول إلى مجموعة مستخدمي IDEA StatiCa Gulf، وهي شبكة إقليمية من المهندسين الإنشائيين الذين يستخدمون IDEA StatiCa في أنحاء الشرق الأوسط.
LinkedIn Groupمجموعة LinkedIn
IDEA StatiCa Gulf - User Group
مجموعة مستخدمي IDEA StatiCa Gulf
Private group • Regional structural engineering Communityمجموعة خاصة • شبكة إقليمية للهندسة الإنشائية
Regional Technical Webinarsندوات فنية إقليمية
Tips & Design Insightsنصائح ورؤى تصميمية
Educational Sessions Updatesتحديثات الجلسات التعليمية
AMA Sessionsجلسات AMA
License Setup
إدارة التراخيص
Follow these protocols to manage your license pool, assign seats, and activate commercial access.
اتبع هذه البروتوكولات لإدارة مجموعة التراخيص الخاصة بك، وتخصيص المقاعد، وتفعيل الوصول التجاري.
STEP 01الخطوة 01
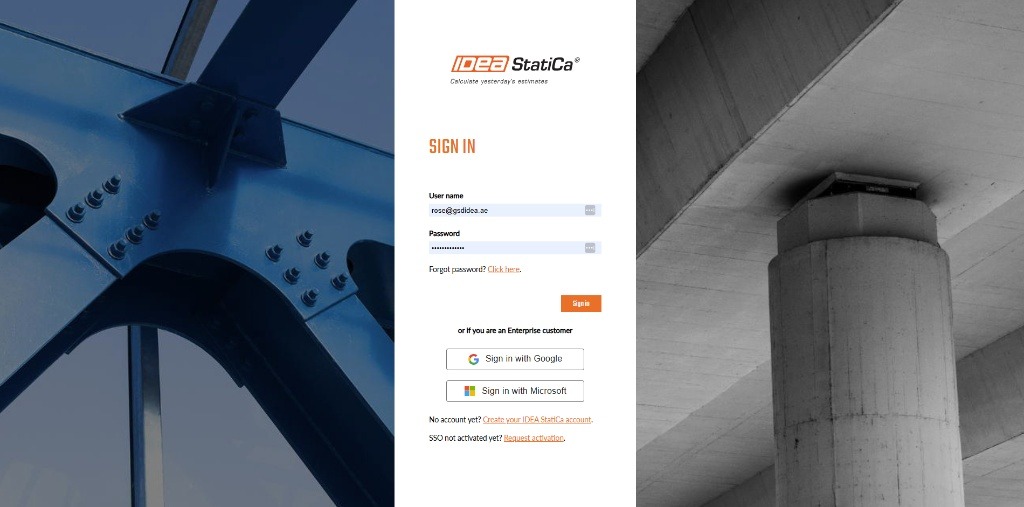
Admin Portal Login
تسجيل الدخول لبوابة المسؤول
Each license pool has a designated administrator. The email address of the administrator for your license pool is included in this email. Please check the email to identify your admin. The administrator must sign in to the User Portal to add users to the license pool.
تحتوي كل مجموعة تراخيص على مسؤول معين. تم تضمين عنوان البريد الإلكتروني للمسؤول في هذا البريد. يرجى التحقق من البريد لتحديد المسؤول الخاص بك. يجب على المسؤول تسجيل الدخول إلى بوابة المستخدم لإضافة مستخدمين إلى مجموعة التراخيص.
Each license pool has one designated administrator.
Identify that admin, then have them sign in to the User Portal.
Note: Only the assigned administrator can start adding users to the license pool.
لكل مجموعة تراخيص مسؤول معيّن.
تم تضمين البريد الإلكتروني الخاص بالمسؤول في الرسالة التي استلمتها.
حدّد المسؤول أولاً، ثم اطلب منه تسجيل الدخول إلى بوابة المستخدم.
ملاحظة: يصبح المستخدم جزءًا من المجموعة التجارية ويمكنه الوصول إلى سير العمل المرخّص.
STEP 02الخطوة 02
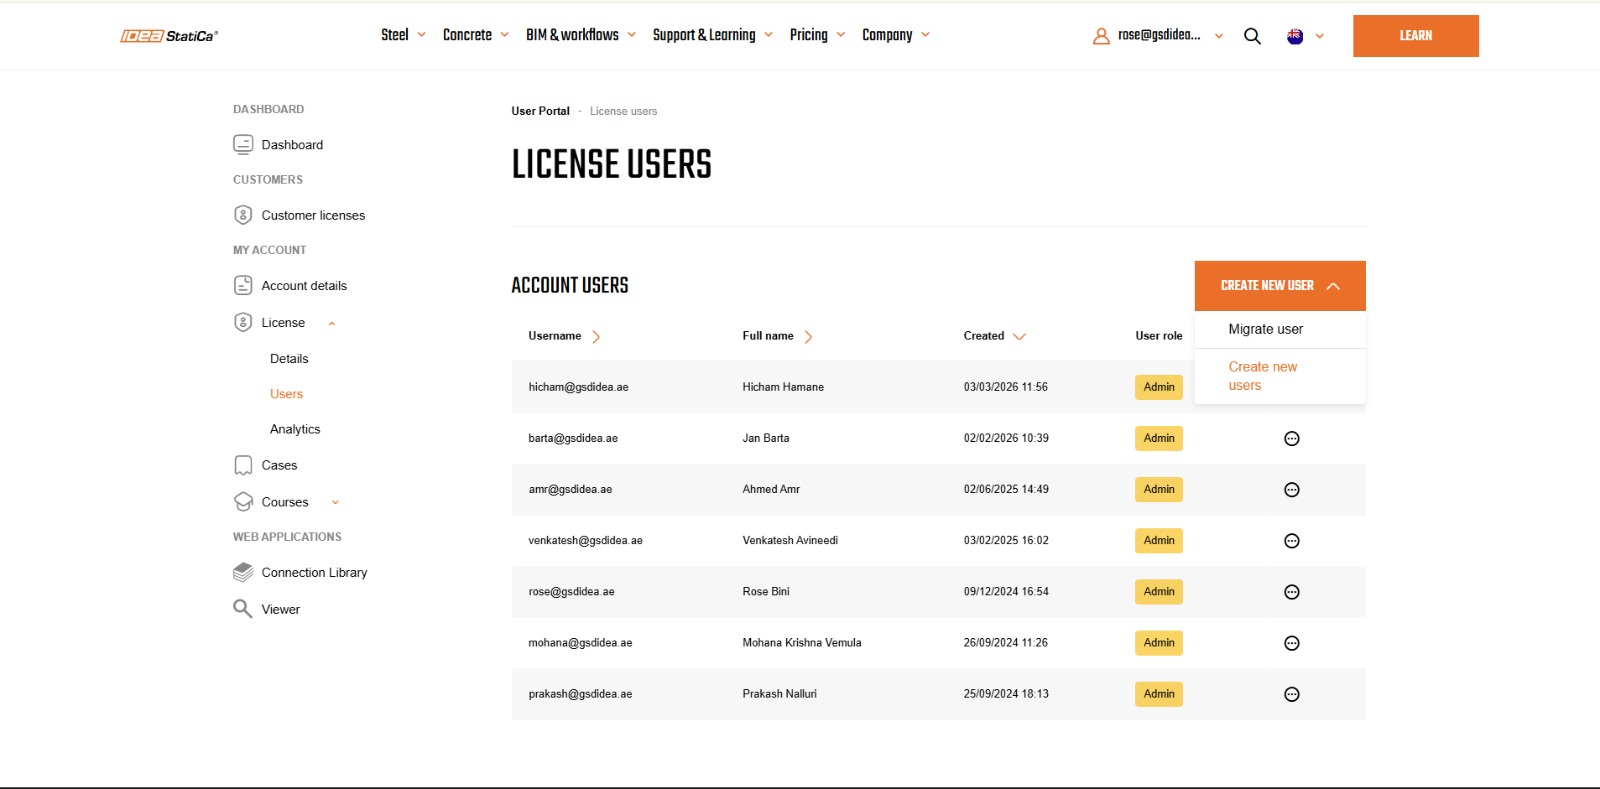
User Creation in License Pool
إنشاء مستخدم في مجموعة التراخيص
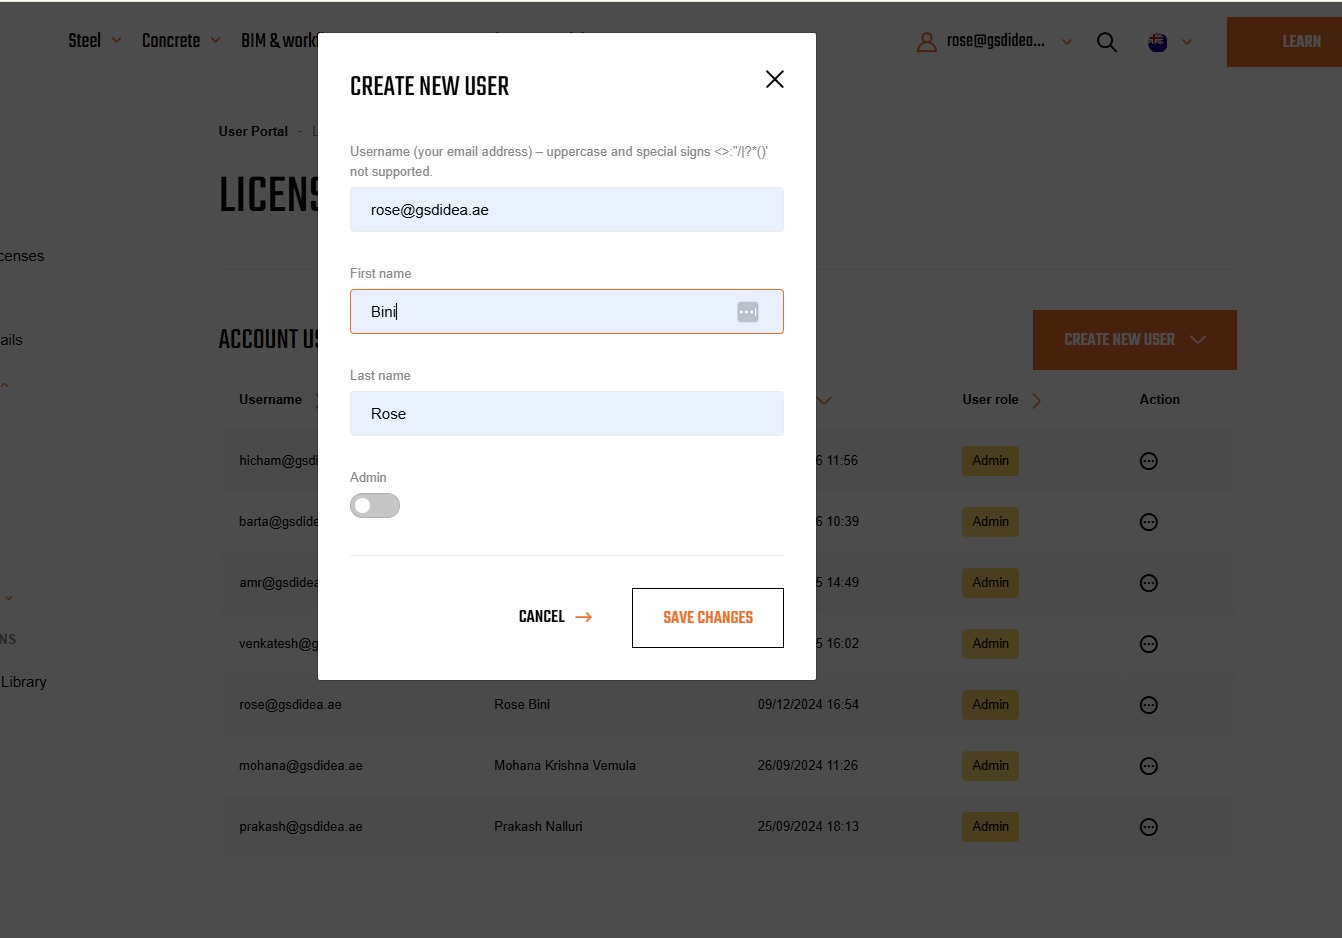
Under the License Users tab, the administrator must select Create New User. This initiates the process of adding a user to the commercial license pool.
ضمن علامة التبويب "مستخدمي الترخيص" (License Users)، يجب على المسؤول تحديد "إنشاء مستخدم جديد" (Create New User). يؤدي هذا إلى بدء عملية إضافة مستخدم إلى مجموعة التراخيص التجارية.
Go to the License Users tab inside the portal.
Select Create New User.
This starts the process of adding the user to the commercial license pool.
Note: Use the user’s correct official email ID to avoid access issues later.
انتقل إلى علامة التبويب License Users داخل البوابة.
اختر Create New User.
يبدأ هذا عملية إضافة المستخدم إلى مجموعة التراخيص التجارية.
ملاحظة: استخدم البريد الإلكتروني الرسمي الصحيح للمستخدم لتجنب مشاكل الوصول لاحقًا.
STEP 03الخطوة 03
User Migration & License Activation
ترحيل المستخدم وتفعيل الترخيص
If you are an existing or trial user, the administrator can select the Migrate User option to transfer your trial license to the commercial license. Once the administrator saves your username, you will be fully integrated into the commercial license pool. After the migration or creation of a new user, you may log in again to start using your commercial license.
إذا كنت مستخدمًا حاليًا أو في فترة تجريبية، يمكن للمسؤول تحديد خيار "ترحيل المستخدم" (Migrate User) لنقل ترخيصك التجريبي إلى الترخيص التجاري. بمجرد أن يحفظ المسؤول اسم المستخدم الخاص بك، سيتم دمجك بالكامل في مجموعة التراخيص التجارية. بعد الترحيل أو إنشاء مستخدم جديد، يمكنك تسجيل الدخول مرة أخرى لبدء استخدام ترخيصك التجاري.
If the user already exists or is on trial, select Migrate User.
Save the username to move that user into the commercial license pool.
After migration or new-user creation, log in again to start using the commercial license.
Note: The user becomes part of the commercial pool and can access licensed workflows.
إذا كان المستخدم موجودًا بالفعل أو يستخدم نسخة تجريبية، اختر Migrate User.
احفظ اسم المستخدم لنقله إلى مجموعة التراخيص التجارية.
بعد الترحيل أو إنشاء المستخدم، سجّل الدخول مرة أخرى لبدء استخدام الترخيص التجاري.
النتيجة: يصبح المستخدم جزءًا من المجموعة التجارية ويمكنه الوصول إلى سير العمل المرخّص.
*We use this to verify your workspace allocation and ensure smooth access to the platform.
*نستخدم هذا للتحقق من تخصيص مساحة العمل الخاصة بك وضمان الوصول السلس إلى المنصة.
Getting Started Guide
دليل البدء
Follow the steps below. Once you complete a step, check the box to unlock the next section.
Selecting Products from the License Pool2. تحديد المنتجات من مجموعة التراخيص
Quick Setup:Open AppLicense SetupReserve Products
إعداد سريع:فتح التطبيقإعداد الترخيصحجز المنتجات
PRODUCT SELECTION
تحديد المنتجات
SHARED POOL • STEEL & CONCRETE • OFFLINE CAPABLEمجموعة مشتركة • صلب وخرسانة • إمكانية العمل دون اتصال
How to choose which IDEA StatiCa products (e.g., Steel or Concrete) you want to reserve from the shared company license pool so that other products remain available for other users.
كيفية اختيار منتجات IDEA StatiCa (مثل Steel أو Concrete) التي ترغب في حجزها من مجموعة تراخيص الشركة المشتركة بحيث تظل المنتجات الأخرى متاحة للمستخدمين الآخرين.
Explore all compatible FEA and CAD software integrations. Filter by application or type, and access dedicated installation videos for your specific software.
استكشف جميع تكاملات برامج FEA و CAD المتوافقة. قم بالتصفية حسب التطبيق أو النوع، واحصل على مقاطع فيديو مخصصة لتثبيت برنامجك.
The IDEA StatiCa Support Center provides guides, tutorials, videos, technical documentation, and troubleshooting information — your go-to place for help!
يوفر مركز دعم IDEA StatiCa أدلة ودروساً تعليمية ومقاطع فيديو ووثائق فنية ومعلومات حول استكشاف الأخطاء وإصلاحها — مكانك المفضل للحصول على المساعدة!
Quick guides to help new users start working with IDEA StatiCa applications.
Tutorials
Design examples that demonstrate how to use different features of the software.
Webinars
Registration for upcoming webinars and access to recordings of previous sessions.
Videos
Short instructional and overview videos about IDEA StatiCa features and workflows.
Theoretical Background
Theoretical Background, principles, and methods used in IDEA StatiCa, including the fundamentals of CBFEM and CSFM.
Verifications
Technical papers and validation examples that verify the accuracy of IDEA StatiCa calculations.
Knowledge Base
A collection of help articles, tips, and explanations of software features.
FAQ
Frequently asked questions about common topics related to IDEA StatiCa applications and methods.
دليل البدء
أدلة سريعة لمساعدة المستخدمين الجدد على بدء العمل مع تطبيقات IDEA StatiCa.
الدروس التعليمية
أمثلة تصميمية توضح كيفية استخدام الميزات المختلفة للبرنامج.
الندوات
التسجيل للندوات القادمة والوصول إلى تسجيلات الجلسات السابقة.
الفيديو
مقاطع فيديو تعليمية وعامة قصيرة حول ميزات وسير عمل IDEA StatiCa.
الخلفية النظرية
الخلفية النظرية والمبادئ والطرق المستخدمة في IDEA StatiCa, بما في ذلك أساسيات CBFEM و CSFM.
التحققات
أوراق فنية وأمثلة تحقق تثبت دقة حسابات IDEA StatiCa.
قاعدة المعرفة
مجموعة من مقالات المساعدة والنصائح وشروحات لميزات البرنامج.
الأسئلة الشائعة
الأسئلة الشائعة حول المواضيع المتكررة المتعلقة بتطبيقات وطرق IDEA StatiCa.
IDEA StatiCa Viewer5. عارض IDEA StatiCa
Quick Setup:Open ViewerUpload FileInspect Model
إعداد سريع:فتح العارضرفع الملففحص النموذج
IDEA STATICA VIEWER
عارض IDEA STATICA
BROWSER-BASED • COLLABORATION • NO INSTALL NEEDEDيعتمد على المتصفح • تعاون • لا يحتاج لتثبيت
A web browser tool where you can view all details of a connection and transfer the design intent to colleagues, even without having the full IDEA StatiCa application installed.
أداة متصفح ويب حيث يمكنك عرض جميع تفاصيل الوصلة ونقل هدف التصميم إلى الزملاء، حتى بدون تثبيت تطبيق IDEA StatiCa الكامل.
The world’s largest cloud database of steel connection designs that you can browse, download, and use as templates in your own projects — helping you find design ideas and solutions quickly without starting from scratch.
أكبر قاعدة بيانات سحابية في العالم لتصميمات الوصلات الفولاذية التي يمكنك تصفحها وتحميلها واستخدامها كقوالب في مشاريعك الخاصة — مما يساعدك في العثور على أفكار وحلول تصميمية بسرعة دون البدء من الصفر.
For any technical or license-related questions about IDEA StatiCa, you can reach out directly via email:
SUPPORT@GSDIDEA.AE.
This is the fastest way to get help with software issues, licensing, or technical queries.
لأي أسئلة فنية أو متعلقة بالتراخيص حول IDEA StatiCa، يمكنك التواصل مباشرة عبر البريد الإلكتروني:
SUPPORT@GSDIDEA.AE.
هذه هي أسرع وسيلة للحصول على المساعدة في مشاكل البرنامج أو التراخيص أو الاستفسارات الفنية.
Overview FAQs
الأسئلة الشائعة حول النظرة العامة
What is the purpose of this portal?ما هو الغرض من هذه البوابة؟
To securely guide you and your team through the technical setup and licensing before our strategic kickoff call.لإرشادك وفريقك بأمان عبر الإعداد الفني والترخيص قبل مكالمة الانطلاق الاستراتيجية الخاصة بنا.
How long will this take?كم من الوقت سيستغرق هذا؟
Usually less than 15 minutes to complete all required steps. You can complete them at your own pace.عادة أقل من 15 دقيقة لإكمال جميع الخطوات المطلوبة. يمكنك إكمالها بالسرعة التي تناسبك.
COMMUNITY FAQs
الأسئلة الشائعة حول الشبكة
Is the LinkedIn group public?هل مجموعة LinkedIn عامة؟
No, it is an exclusive invite-only group reserved for enterprise clients and engineering leaders.لا، إنها مجموعة حصرية للمدعوين فقط مخصصة لعملاء المؤسسات والقادة الهندسيين.
Workspace FAQs
الأسئلة الشائعة حول مساحة العمل
I cannot find the activation email. What should I do?
لا يمكنني العثور على بريد التفعيل الإلكتروني. ماذا يجب أن أفعل؟
Please check your spam or junk folder. If you still cannot find it, please email us at support@gsdidea.ae
, and we will assist you.يرجى التحقق من مجلد البريد غير المرغوب فيه. إذا كنت لا تزال غير قادر على العثور عليه، يرجى مراسلتنا عبر support@gsdidea.ae وسنساعدك.
I could not find the Admin username in the email. What should I do?
أريد أن تتم إضافتي كمستخدم مسؤول. ماذا يجب أن أفعل؟
Please email us at support@gsdidea.ae
using your company email address. We will provide the Admin details or add you directly to the license pool.يرجى مراسلتنا على support@gsdidea.ae باستخدام بريدك الإلكتروني الرسمي، وسنساعدك في إضافتك كمسؤول.
I want to be added as an Admin user. What should I do?
لا يمكنني العثور على بريد التفعيل الإلكتروني.
Please email us at support@gsdidea.ae
using your official email ID, and we will assist you in getting added as an Admin.تأكد من أن مسؤول تكنولوجيا المعلومات قد أضاف بريدك الإلكتروني وتحقق من مجلد البريد العشوائي.
Implementation FAQs
الأسئلة الشائعة حول التنفيذ
Do I need IT admin rights to install?هل أحتاج إلى صلاحيات المسؤول للتثبيت؟
Yes, installing IDEA StatiCa and BIM links requires local administrator privileges.نعم، يتطلب تثبيت IDEA StatiCa وروابط BIM صلاحيات مسؤول محلي.
What are the system requirements for IDEA StatiCa?ما هي متطلبات النظام لبرنامج IDEA StatiCa؟
Operating system: Minimum: Windows 10 64-bit | Recommended: Windows 11 64-bit.
Processor: Recommended: Intel Core i7 or AMD Ryzen 7.
RAM: Minimum: 16 GB | Recommended: 32 GB.
Hard disk: Installation space: 3 GB.
نظام التشغيل: الحد الأدنى: Windows 10 | الموصى به: Windows 11.
الذاكرة العشوائية (RAM): الحد الأدنى: 16 جيجابايت | الموصى به: 32 جيجابايت.
I am confused about where to begin with connection design. What should I do?أنا محتار من أين أبدأ بتصميم الوصلات. ماذا يجب أن أفعل؟